Some 3D prints are too large to 3D print in one go. Therefore, a lot of people are searching online for the best ways to connect 3D printed parts together. If you need the parts to be connected temporarily or permanently. With this bonding guide, we will go over many different and unique ways we could find, explain the pros and cons and recommendations what method works best with FormFutura 3D printing materials.
Acetone
ABS 3D printed pieces made with materials like our, Premium ABS, EasyFil ABS and Top seller TitanX can be bonded together using acetone or paint thinner. In actuality, any anything that dissolves in acetone is a solid contender.
An invisible seam and a highly strong bond are produced by this sort of bonding.
Acetone can be used to join two components together by applying a thin layer of acetone to both sides. A little brush or a piece of cloth dipped in acetone might be used for this. Use caution when using acetone to 3D printed parts, as it may cause damage, particularly if the pieces are thin.
When you adhere two pieces together, the thin layer on the surface that has been diluted by the acetone will "mix." You might need to use tape or clamps to hold the pieces that are being glued together while they dry.
The amount of acetone used and the size of the components will determine how long it takes for the acetone to evaporate and form a strong, compact plastic coating. This process may take a few minutes or several hours.
This could be the most effective method for joining two ABS components. It is quite powerful and, when applied correctly, undetectable.
Surface preparation for bonding: There must be no debris or grease on any surface. Before using acetone, smooth up any uneven areas with some sandpaper. ABS and other materials, are suitable for bonding.
Safety
Acetone burns quite easily. Keep it away from sparks, hot surfaces, and open flames. Because it's a volatile liquid, you should use it outside or in an area with good ventilation. When working with acetone, take the necessary precautions and immediately get outside if you start to feel lightheaded.
3D Pens
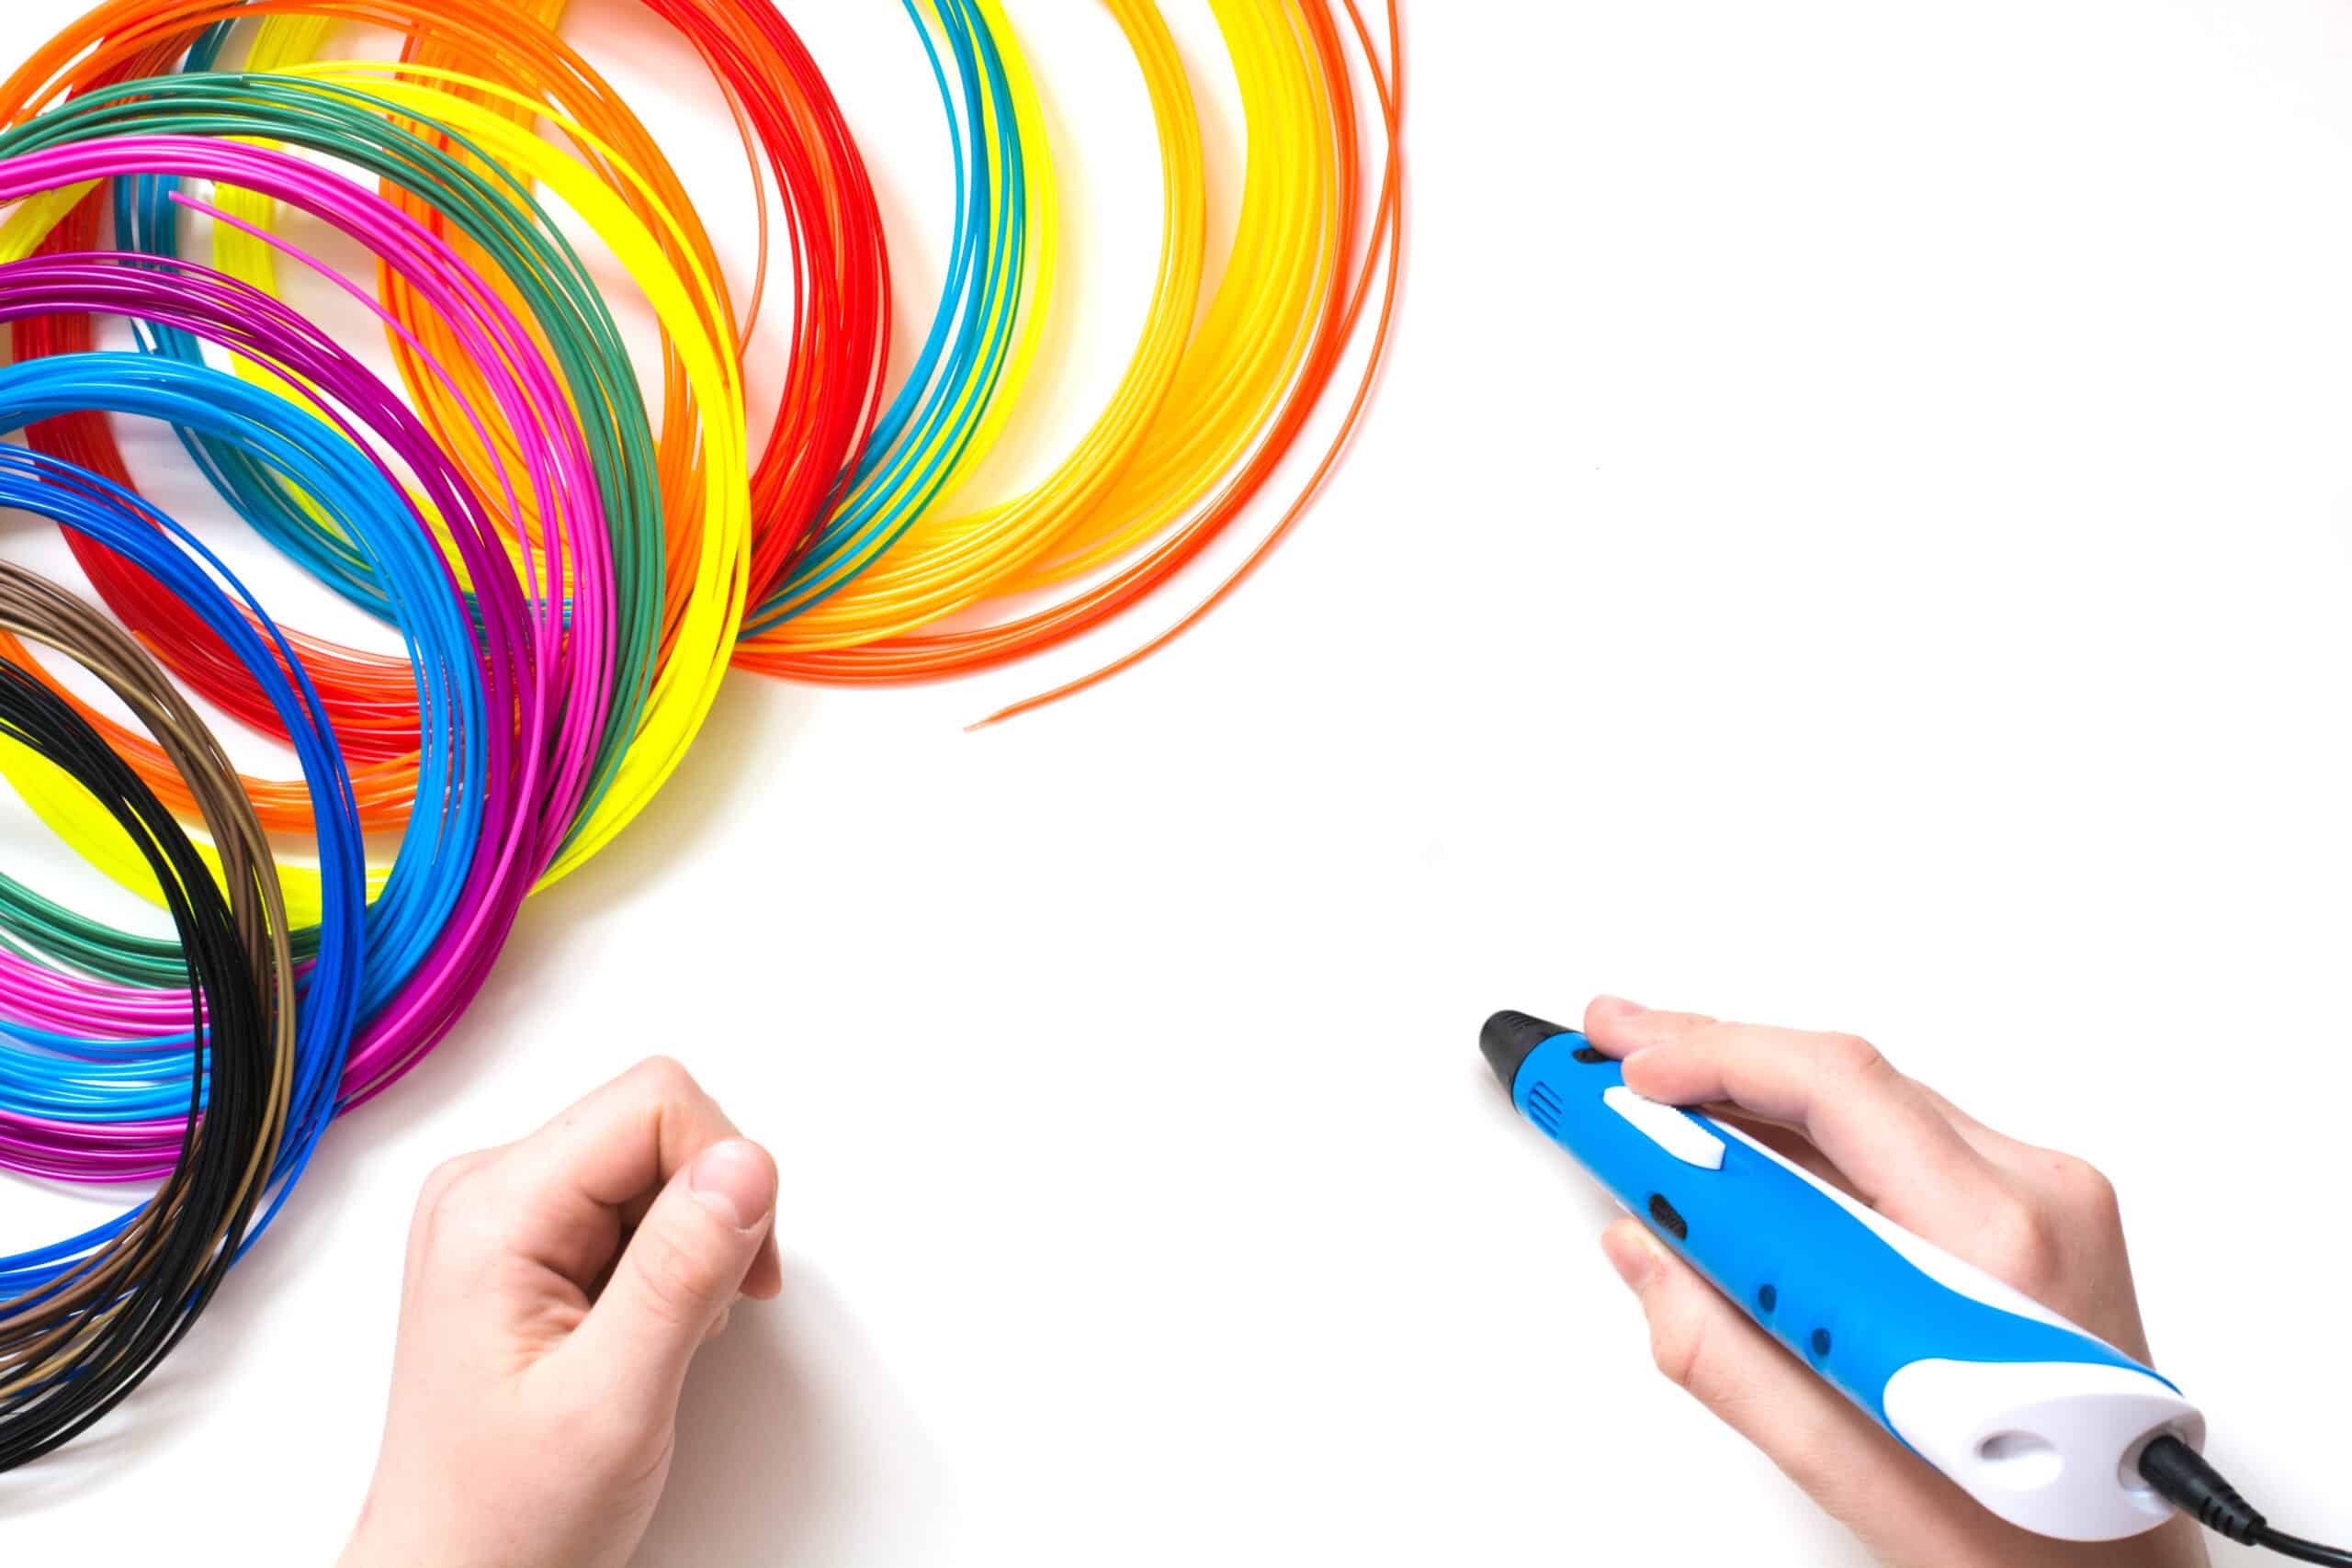
3D printing pens can be used to bond 3D printed parts together. The process is simple: first, heat up the pen and select the appropriate filament type. Then, melt the two parts together by running the pen along the joint. The bond is strong enough for non-functional parts, but it's not as strong as glue, so it's not recommended for parts that will be under stress.
Here are some of the benefits of using a 3D printing pen to bond 3D printed parts:
- It's a cheap and easy way to bond parts together.
- You can use the same filament that you used to print the parts, so you don't have to worry about color matching.
- The bond is strong enough for non-functional parts.
There are also some drawbacks of using a 3D printing pen to bond 3D printed parts:
- The bond is not as strong as glue, so it's not recommended for parts that will be under stress.
- The process can be messy, and it can be difficult to get a clean bond.
- It takes some practice to master the technique.
Overall, using a 3D printing pen to bond 3D printed parts is a good option for non-functional parts. If you need to bond parts that will be under stress, you'll need to use a stronger adhesive, such as glue or epoxy.
PLA "Glue Sticks"
Ever wonder if your trusty hot glue gun could become a secret weapon for joining 3D printed parts?
Join two 3D printed parts from the inside, leaving the outer surfaces flawlessly smooth. This PLA "glue stick" hack makes it possible! Apply molten PLA from the interior, creating a hidden bond that prioritizes a beautiful exterior finish.
The Process in Action:
Just like a regular glue stick, heat up the PLA filament in your hot glue gun. Once molten, apply the PLA to the interior seams where the two 3D printed parts meet. Then allow the PLA to cool completely, creating a strong and invisible connection between the parts.
It's important to acknowledge the limitations of this hack:
- Temperature: Standard hot glue guns typically operate at lower temperatures than what's ideal for melting PLA effectively. While high-temperature options exist, they're less common and more expensive.
- Feeding the PLA Glue sticks: Hot glue guns rely on a feed mechanism designed for grabbing standard glue sticks. The smooth, hard surface of PLA filament can make it difficult for the mechanism to grip the "glue stick" properly.
Workarounds:
Here are some solutions to get your PLA "glue stick" working:
- Sanding is Key: To help the feed mechanism grab the PLA, try sanding the filament lightly before inserting it into the hot glue gun. This creates a textured surface for better gripping. Another option is to print ridges into the PLA stick.
- The Blob and the Bump: While you can simply deposit a blob of molten PLA and press the parts together, this might leave a visible bump at the joint. The PLA cools and hardens quickly, limiting its ability to spread smoothly.
It's important to note that molten PLA doesn't create a true weld on a molecular level. Instead, it forms a strong bond by slightly melting the surfaces it touches and filling in any gaps. Think of it as a "pseudo-weld" – strong enough for most applications, but not a perfect fusion.
Using PLA filament as a "glue stick" in your hot glue gun is a clever hack with its fair share of creativity. While it won't create a true weld, it offers a unique way to achieve strong, hidden bonds within your 3D printed creations. Just remember the temperature limitations and potential for bulk at the joint. With a little ingenuity, you can unlock new possibilities for joining your 3D printed parts!
3D Print Glue
Superglue
a quick and easy way to join those 3D printed parts? Superglue, also known as cyanoacrylate, might be your best bet! It's a popular choice for a reason:
- Simple to use: Just a drop or two is all you need, making it perfect for beginners.
- Lightning fast: Sets in seconds, saving you tons of time.
- Strong bonds: Creates a powerful hold that keeps your prints together.
- Clean finish: Dries clear, so you get a nearly invisible seam.
Here's the catch: Because it works so fast, you need to be prepared. Make sure your parts are lined up perfectly before applying the glue. Once it sets, there's no going back! Hold the pieces together firmly for about a minute, and let them sit for a few more minutes to fully cure.
Superglue is great for most 3D printed materials, but it's not a fan of flexibility. If you're working with bendy filaments, superglue will form a stiff layer that can easily crack. In that case, you might want to explore other joining techniques.
PVC Glue
PVC glue has been a staple of the community for years now. Many people online have been recommending this technique for years now.
This readily available adhesive boasts impressive strength and affordability, whispering promises of a future free from fiddly screws and nuts. However, before you toss your hardware collection, a crucial scientific reality check is necessary.
PVC cement excels at creating permanent bonds by chemically fusing materials like PVC pipes. Unfortunately, PLA, the most widely used 3D printing filament, has a different chemical makeup.
The specific solvents within PVC cement simply don't interact favourably with PLA. Instead of the desired fusion, you might experience weak adhesion or even surface damage.
3D Gloop!
is a powerful adhesive designed to tackle all your 3D printing needs. It excels at bonding ABS, PLA, and PETG filaments, creating a permanent and reliable connection between your 3D printed parts.
But that's not all! 3D Gloop! also works wonders when it comes to print adhesion. Whether you're using a heated or unheated glass, metal, or even taped build plate, 3D Gloop! ensures your prints stick firmly throughout the printing process.
Here's the science behind the magic: 3D Gloop! utilizes tiny particles (nanoparticles) made from your chosen filament (PLA or ABS) suspended in a special liquid that hardens rapidly. This rapid hardening process creates a strong bond, fusing your prints together or securing them to the build plate for flawless printing.
Looking to eliminate those pesky layer lines? 3D Gloop! has you covered! Simply brush a thin layer onto the desired area, and watch in seconds as a smooth, glossy finish emerges.
For optimal results, lightly sand your print (up to 200 grit) before applying 3D Gloop!. Then, follow up with another light sanding after the Gloop! dries. Now your creation is prepped and primed for painting!
Need extra strength? No problem! 3D Gloop! allows for multiple applications. Just remember to wait about 10 minutes between coats for best results.
Friction Welding
Friction welding is a handy technique for joining 3D printed pieces, particularly for cosplay props or costumes. It works by creating a slight melt on the edges of two pieces, allowing them to be pressed together and smoothed for a strong bond. This helps prevent cracks from forming in paint or filler (like Bondo) applied over the seam.
Here's the beauty of this method: it's versatile! You can even use leftover filament or scraps from failed prints as filler material, melting them along the seam for additional strength. This technique works well with PLA filament, and even better with Tough PLA.
However, it's important to understand the limitations. Friction welding doesn't involve super high heat or complete melting, so it won't create an unbreakable bond. It's best for situations where the parts won't experience significant stress. But for basic applications, especially with props, friction welding is a simple and effective way to achieve a strong, seamless join.
Safety first! Always wear eye protection when using any heat-based techniques for 3D prints.
Soldering Iron
Taking things a step further, you can use a wood burner or a repurposed soldering iron for more advanced joining techniques. These tools offer a variety of tip options, with a flat head being ideal for smoothing seams and creating a polished look.
For stronger bonds, you can even experiment with creating "X" patterns by melting the plastic pieces together. To ensure precise placement, it's recommended to temporarily secure the parts with tape or hot glue. Important safety note: Avoid using super glue or CA glue here. The heat from the soldering iron will activate harmful chemical fumes, so only use these glues in a well-ventilated area or with a respirator.
Now for the fun part! Once the pieces are secured, use the soldering iron to melt the plastic along the seam. Don't be shy about adding leftover filament as filler material - the more material you use, the stronger the bond. Simply keep folding the melted plastic together until you feel a secure connection form. Any remaining bumps or imperfections can be sanded smooth later.
Here's a quick breakdown of the pros and cons:
Pros:
- Affordable - Soldering irons are readily available at a low cost.
- Strong Bonds - This technique can create a relatively strong connection between parts.
- Efficient - It's a quick and easy way to join larger areas.
Cons:
- Requires Post-Processing - The welding process will leave marks on the plastic, necessitating additional sanding and finishing work.
- Limited Detail - Not ideal for intricate 3D prints with fine details.
- Fume Safety - Use proper ventilation and avoid inhaling fumes created by melting plastic.
Remember, safety first! Always prioritize good ventilation and wear eye protection when using a soldering iron.
The video below from ubcengphysprojectlab showcases well how this technique works.
Stapels
The plastic welding gun offers a powerful alternative for joining 3D printed parts. This affordable kit typically comes with a variety of tools and different types of pre-shaped welding staples. Here's how it works:
- Safety First: Similar to other heat-based techniques, prioritize working in a well-ventilated area. Both the gun and the melting plastic can release harmful fumes.
- Heat Up and Press: Pull the trigger to rapidly heat the chosen staple. Once hot, press the staple firmly into the seam where you want to join the two 3D printed parts.
- Cool and Finish: Release the trigger and allow the staple to cool completely. Once cooled, you can use snippers to remove the excess plastic from the connection point, leaving a smooth and flat finish.
The Big Plus: This technique creates incredibly strong bonds, making it ideal for functional parts that need to withstand some stress. Plus, it's undeniably fun and easy to use!
The Considerations:
- Cost: Compared to other methods, plastic welding guns are a bit more expensive upfront.
- Fumes: As mentioned earlier, proper ventilation is crucial to avoid inhaling harmful fumes.
- Detail Friendly? Not Quite: This technique isn't ideal for highly detailed areas or final finished products, as the staples can leave visible marks.
While it might not be the perfect solution for every project, the plastic welding gun offers a fast and effective way to create robust connections for your 3D prints. Just remember to prioritize safety and consider the final aesthetics of your project before welding away!

Resin
UV resin welding might seem like a convenient option, especially if you already have a resin printer and its accompanying supplies. Here's the lowdown:
The Process:
- Safety First (Seriously): Always wear gloves when handling uncured resin, as it can irritate your skin.
- Apply and Cure: Pour a small amount of resin into a cup and use a brush to apply a thin layer along the seam you want to join. Finally, use a UV light to cure the resin, essentially welding the two parts together.
The Appeal:
- Smoothing Potential: UV resin can potentially help smooth out minor imperfections on your 3D prints.
- Convenience Factor: If you already have resin and a UV light on hand, this method might seem readily available.
- Speed and Ease: Applying the resin and curing it with UV light is a relatively quick process.
The Reality Check:
- Weak Bond: Unfortunately, UV resin welding creates a notoriously weak bond between parts. It's simply not strong enough for most functional applications.
- The Mess Factor: Working with uncured resin can be messy and requires careful handling. Additionally, the fumes from the resin can be unpleasant.
- Limited Control: Accurately applying a thin layer of resin and ensuring a clean weld can be quite challenging.
The Bottom Line:
UV resin welding is a risky shortcut best avoided for joining parts that need any structural integrity. It can potentially damage your prints and leave you with a weak connection. For truly strong and reliable bonds, consider exploring the other techniques mentioned earlier.
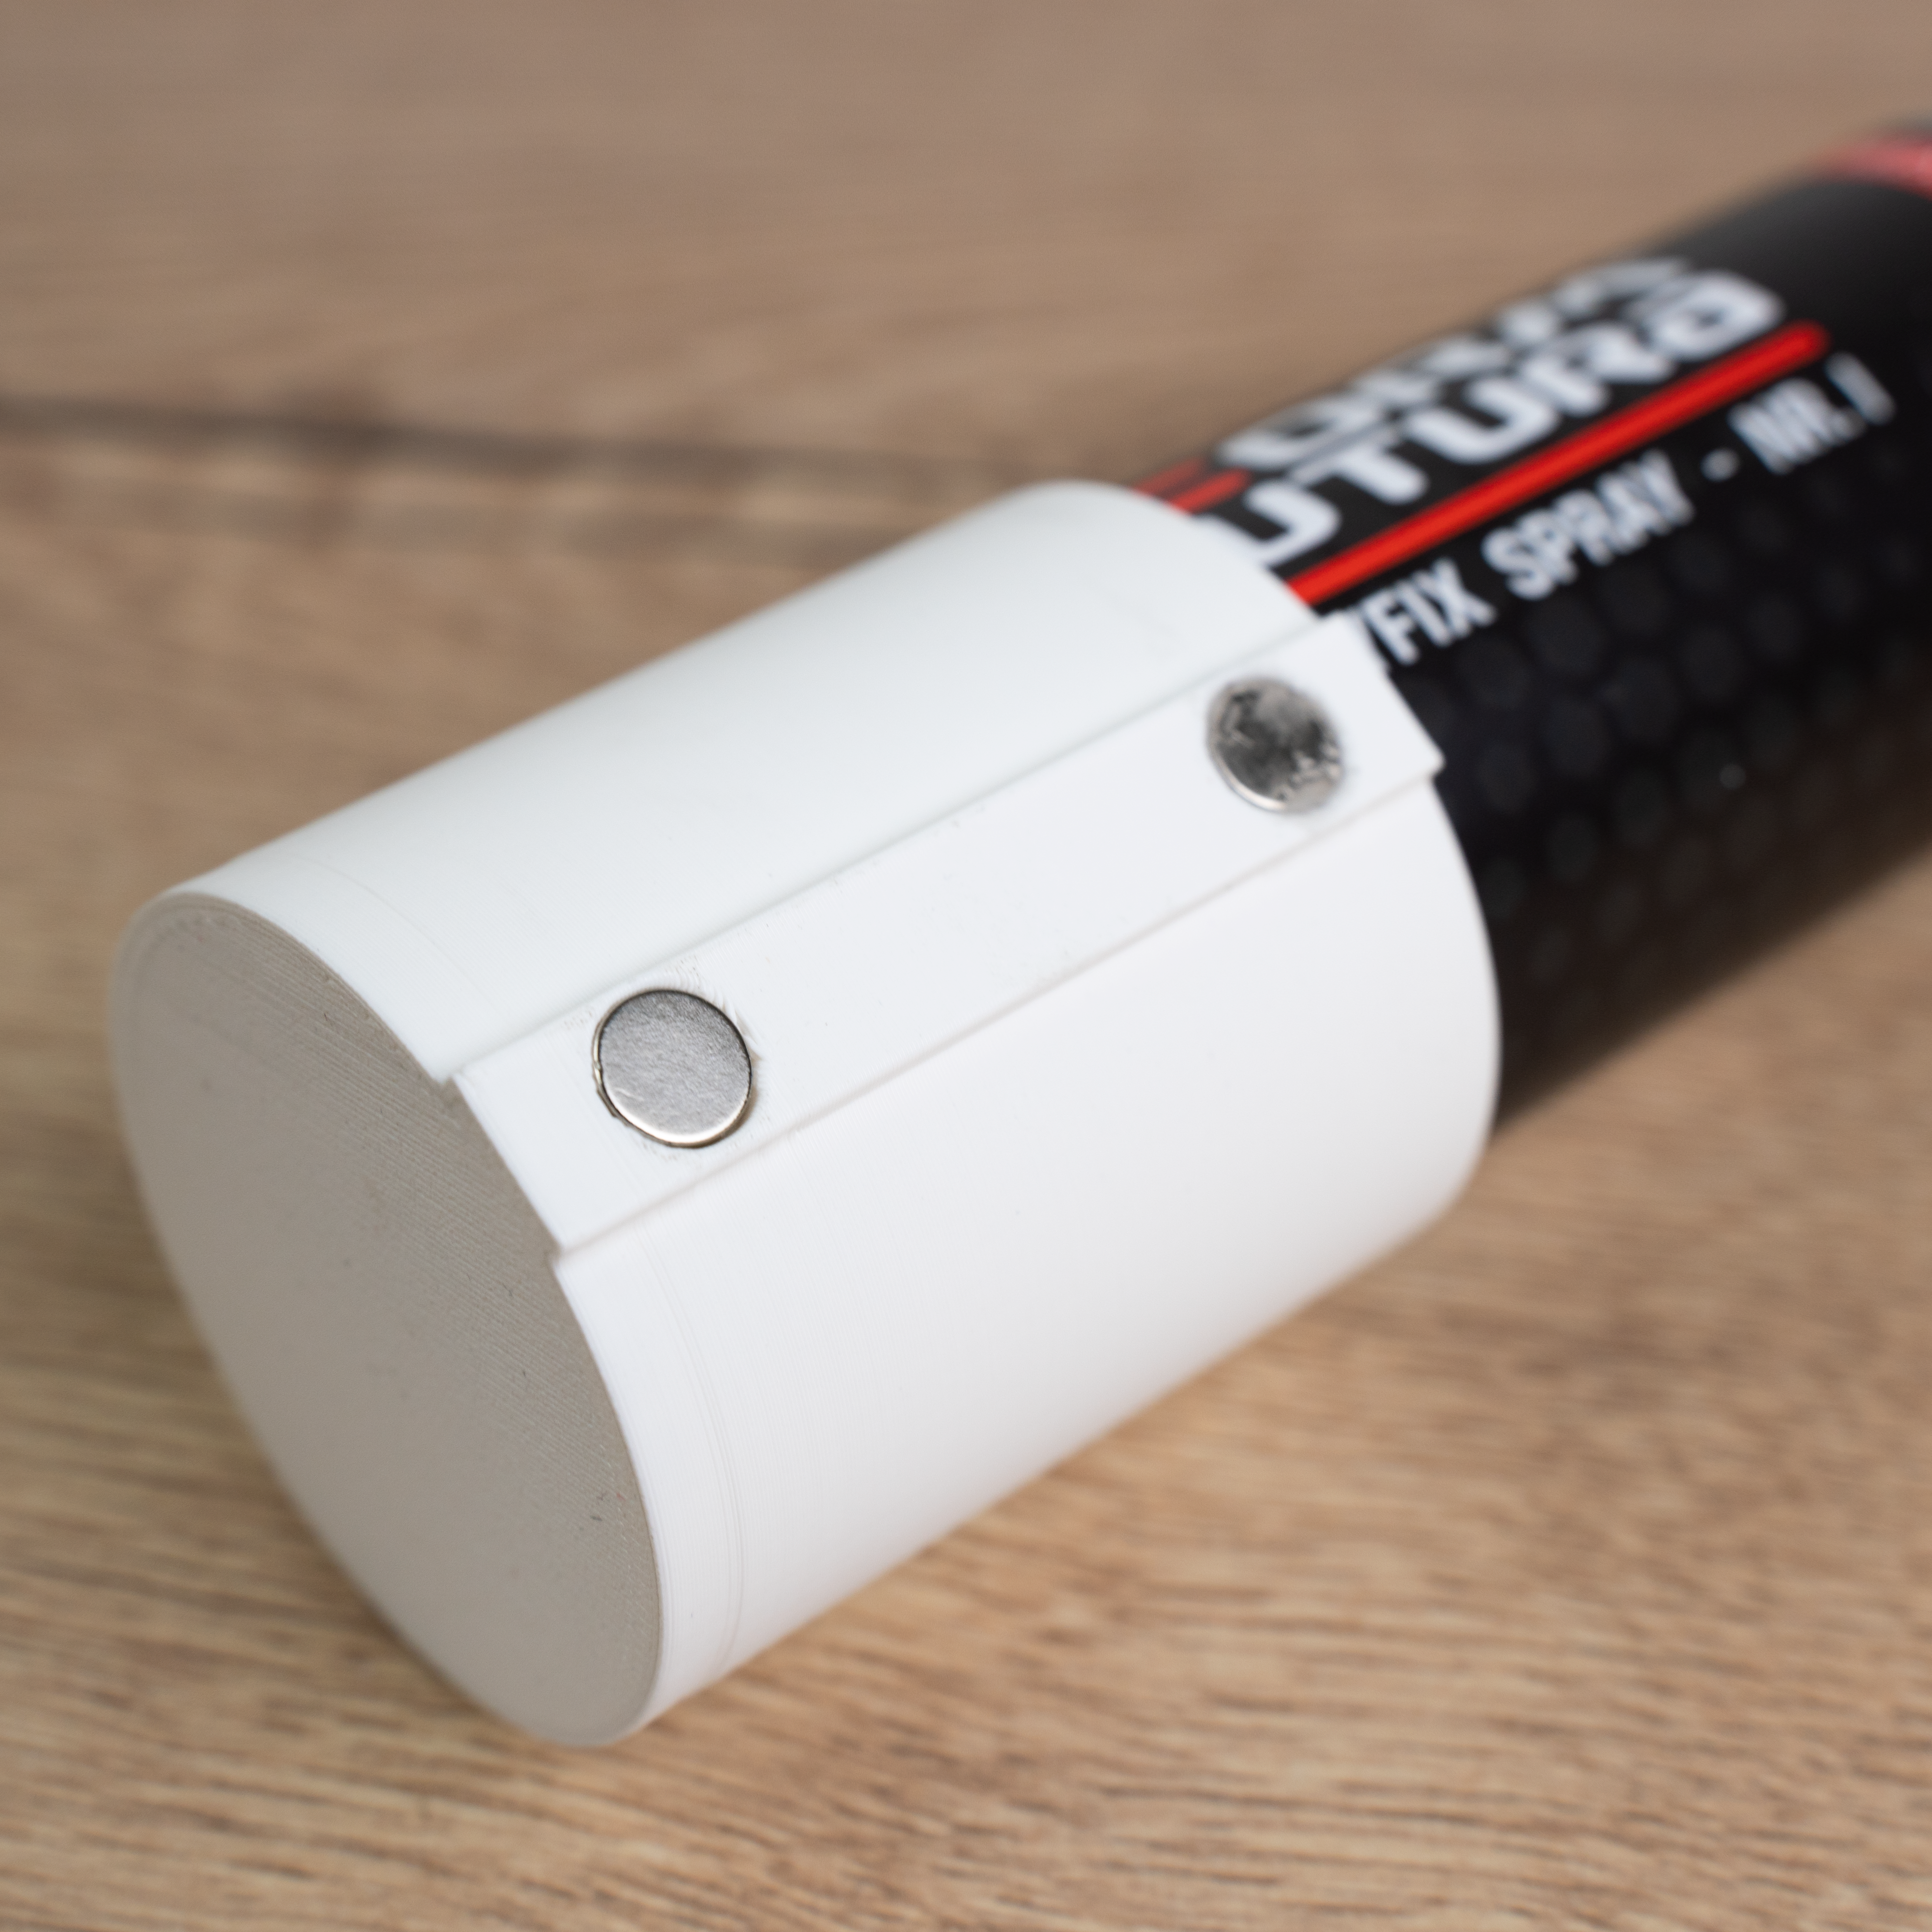
Magnets
Magnets offer a unique and user-friendly approach to joining 3D printed parts. Here's how it works:
The Magic of Attraction:
- Design Integration: During the design phase of your 3D model, incorporate designated spaces within the print to house small magnets.
- Magnetic Pull: Once printed, simply insert the magnets into the designated cavities. The natural attraction between the magnets will hold the two pieces together.
The Allure of Magnets:
- Simplicity: This method requires minimal additional tools or materials, making it incredibly user-friendly.
- Removable Connections: Magnets allow for easy disassembly and reassembly of your prints, which can be beneficial for certain projects.
- Clean Finish: Since there's no gluing or welding involved, the final product maintains a clean and seamless appearance.
Things to Consider:
- Strength Limitations: The strength of the bond relies solely on the magnet's size and type. Weaker magnets might not be suitable for heavy-duty applications.
- Planning is Key: Successful magnet integration requires careful planning during the design stage to ensure proper placement and magnet strength.
- Potential for Snag and Detachment: Depending on the application, strong magnets could snag on clothing or detach unexpectedly.
Partial prints/joinery
While traditional joinery methods were developed for wood, their core principles can be surprisingly well-suited for 3D printed parts.
Simple Lap Joints: This basic technique translates directly to 3D printing. Design your model with overlapping sections that slot together for a strong connection.
Box Joints (Finger Joints): This variation involves interlocking "fingers" for added strength. Design these features within your 3D model to create a seamless and sturdy bond.
Dovetail joints: The dovetail joint, a carpentry staple known for its strength, can be surprisingly well-adapted for 3D printed parts. This joint features interlocking "tails" and "pins" for a secure and visually appealing connection.
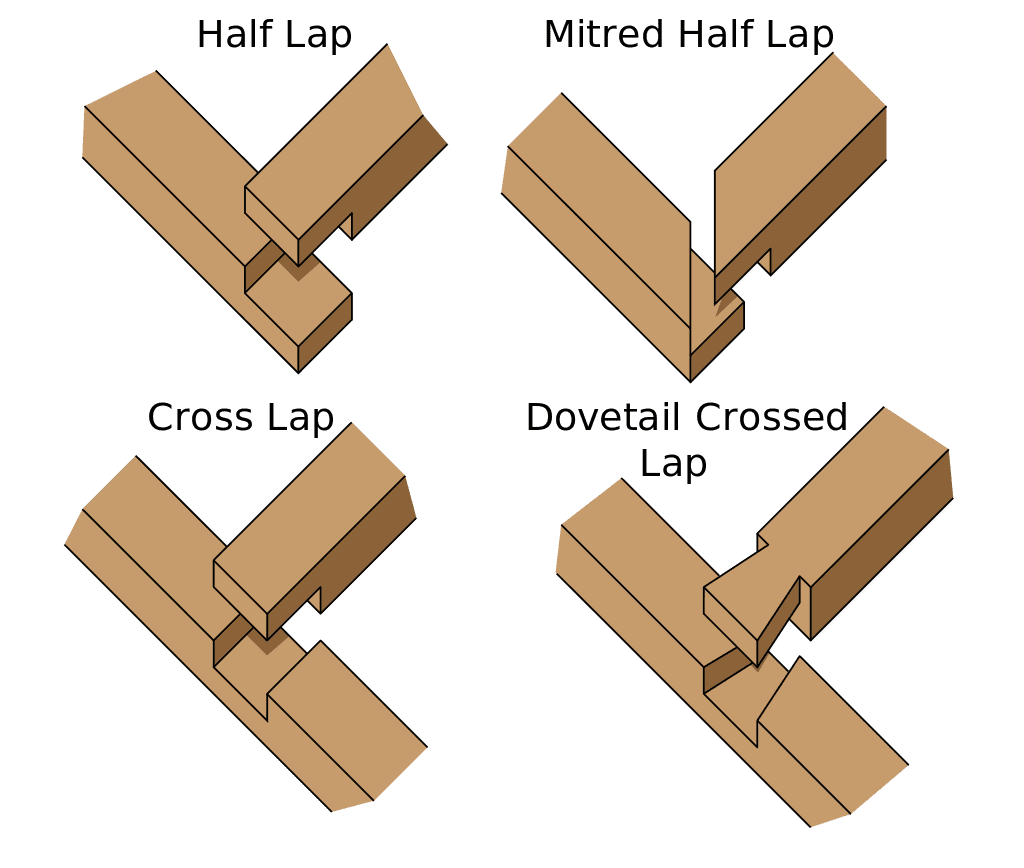
By Fred the Oyster, CC BY-SA 4.0, https://commons.wikimedia.org/w/index.php?curid=34834827
Design your models with joinery in mind. 3D modelling software allows for precise design of interlocking features, ensuring perfect fits for your joints.
Test Prints and Adjustments by printing small test pieces helps you refine your joint designs and ensure a good fit before committing to a larger print.