Print Techniques – Temperature Towers
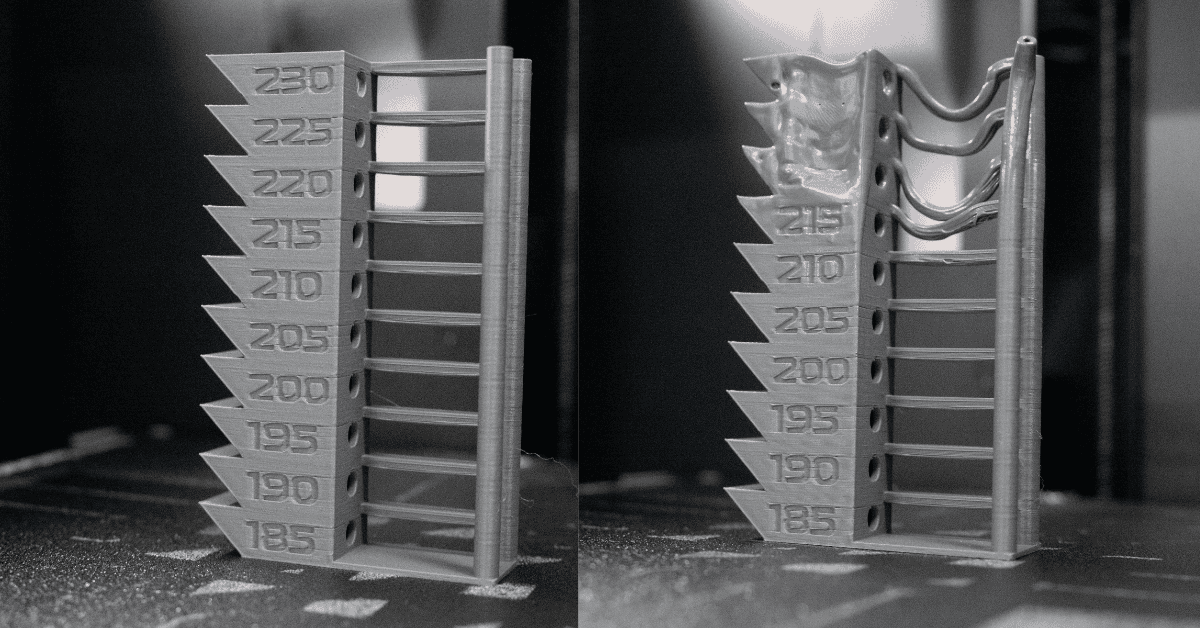
A temperature tower is basically a 3D printing test where you print a tall object with different sections, each at a different temperature. It’s like a staircase, but each step is printed a bit hotter or cooler than the last one. The idea is to see which temperature gives you the best print quality for your filament. You can check how smooth the layers are, if there’s any stringy mess, or if the material is strong enough. By the end, you’ll know the perfect temperature for your filament to get the best results without any trial and error.

How to correctly set up and print a temperature tower?
- Download a temperature tower 3D model.
- Use your slicer to set different temperature zones based on your filament’s recommended range, usually in 5-degree increments.
- Input your specific print parameters (e.g., print speed, bed temp) to ensure accurate results.
- Print the temperature tower and analyse the results!
Common Issues
The three most common aspects evaluated using temperature towers are layer adhesion, stringing, and the quality of the print surface. Let’s dive into each of these points in more detail.
Layer Adhesion
Layer adhesion is the most critical aspect of print quality that people assess with a temperature tower. Temperature variations influence how well the layers bond to each other, impacting both the strength and the visual appearance of the model.
If the material isn't melting adequately, it may not bind properly to the layer below, resulting in weak points at the layer joints. This can lead to print failures or make the finished part particularly brittle. When the print is complete, this issue becomes evident as the layers can be pulled apart or there are visible gaps between them.
Stringing
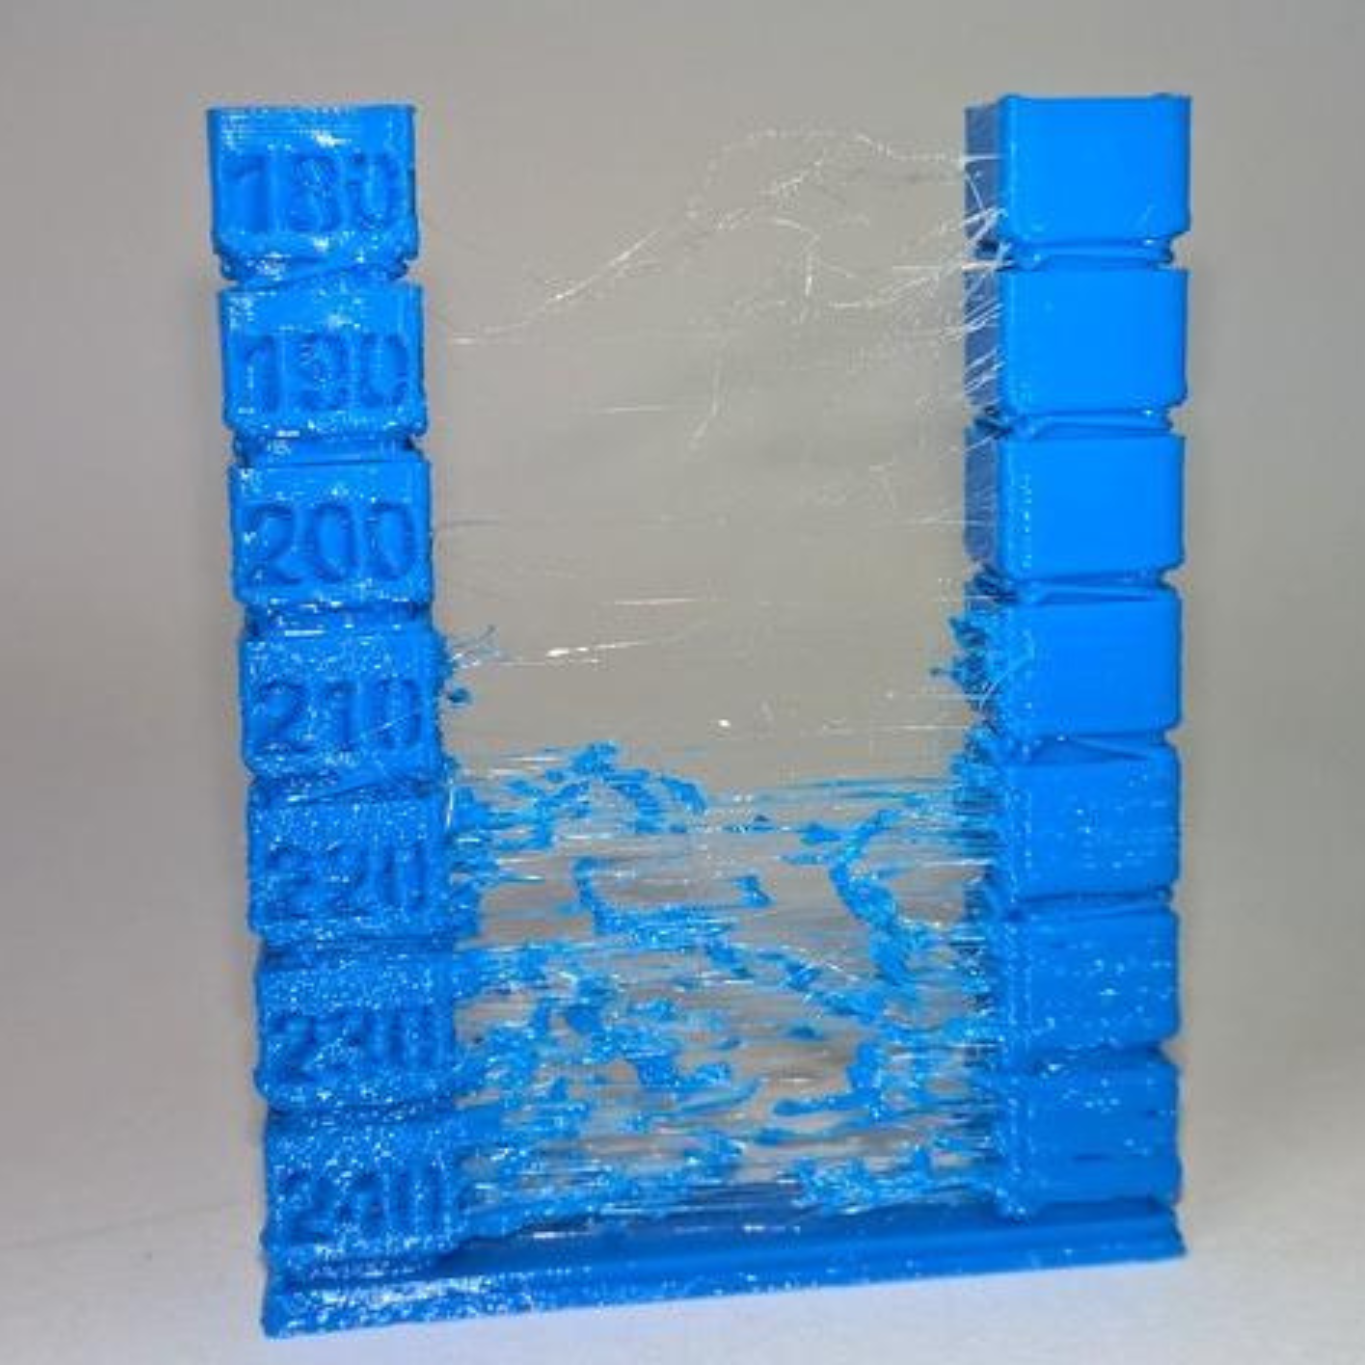
Stringing is another common issue evaluated with temperature towers. It occurs when small amounts of filament escape the nozzle while it moves from one point to another, creating fine filament hairs between points that shouldn't be connected.
While stringing doesn't affect the structural integrity of the print as much as layer adhesion, it's a clear indicator of improper temperature settings. More stringing means more post-processing work is needed, which can be a significant inconvenience, especially when time is critical.
Print Surface
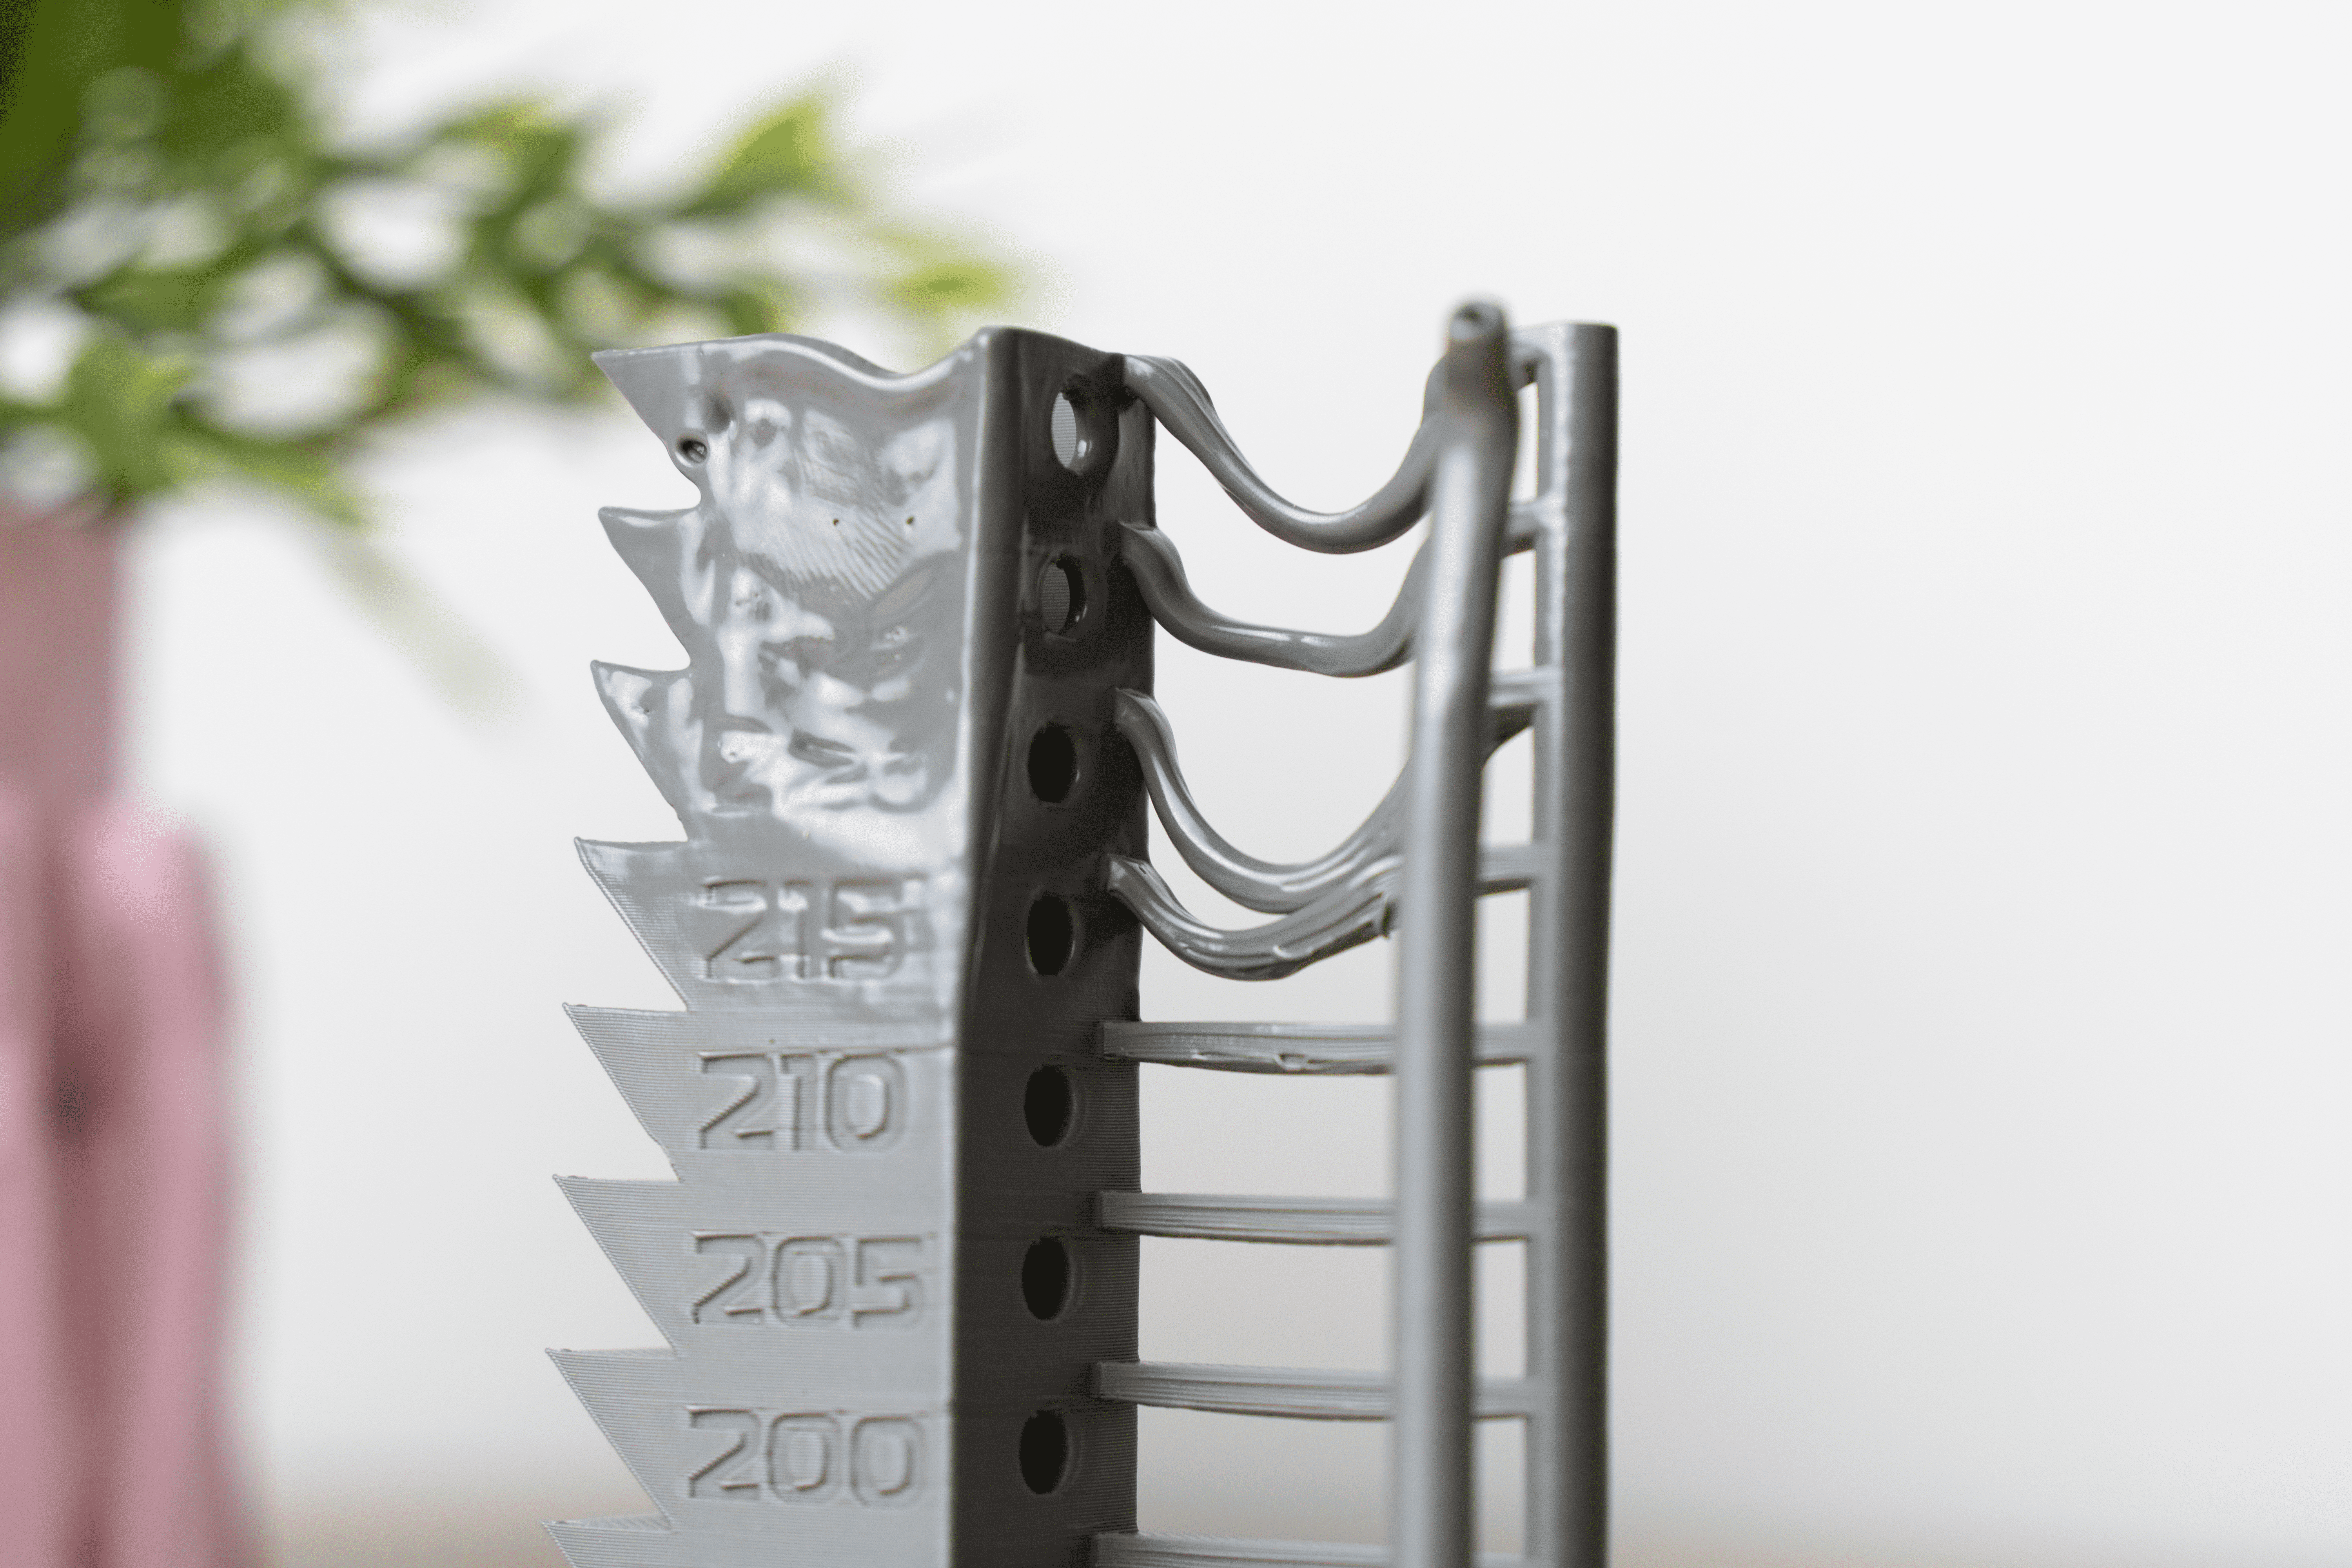
The quality of a print's surface is closely linked to the filament's temperature, even though it's not often immediately associated with it.
If the material isn't melting consistently and uniformly, you’ll lose print details. This can manifest in various ways, such as blobs or zits on the surface or curves appearing stepped due to layers not joining smoothly. Ensuring the right temperature helps achieve a smooth, detailed surface finish on your prints.
How to interpret the results of a temperature tower?
When calibrating your 3D printer, start by examining your prints visually and manually, and then use tools like pliers for a detailed assessment. Begin by testing each temperature setting, twisting the small protrusions to see how they respond. Pay attention to how the material behaves: if it's too hot, it becomes brittle; if too cold, the layers don’t adhere properly and may separate.
After these initial tests, dismantle the entire print to understand its overall performance. Focus on twisting each bridge along its length to detect any weak points. Based on these observations, select a middle temperature, such as 215°C, and fine-tune it with retraction towers.
Next, run the temperature tower test again to confirm the best settings for your application. Remember, the ideal temperature depends on whether you prioritize strength, aesthetics, or a balance of both. Sometimes, a different temperature might feel better even if it introduces artifacts. In such cases, you can run additional calibration sequences—adjusting print speed, fan speed, and retraction settings—to achieve the best possible quality at that specific temperature.
While the process may seem complex, it’s important to see the temperature tower as a guide to a comprehensive calibration strategy, opening up multiple optimization possibilities for your 3D prints.
Tips and Tricks
Drying filament is crucial because moisture can cause printing issues such as stringing, bubbles, and poor layer adhesion. Filaments, especially hygroscopic ones like PLA and Nylon, absorb moisture from the air.
Using a filament dryer or an oven at low temperatures (typically around 45-55°C for several hours) can remove this moisture. Dry filament ensures better print quality, improved mechanical properties, and more reliable extrusion.
Retraction settings help prevent stringing and oozing during printing. Adjusting the retraction distance and speed can significantly impact print quality. Start with small increments to find the optimal balance:
- Distance: Typically ranges from 2 to 7 mm, depending on the filament type and printer.
- Speed: Generally, 20-60 mm/s. Too slow can cause stringing, while too fast might grind the filament.
Keep in mind to always refer to the settings you can find on our labels for the correct settings!
Fine-tuning these settings minimizes artefacts and ensures cleaner prints.
A clean nozzle is essential for consistent extrusion and print quality. Residue or clogs can cause under-extrusion, stringing, and poor surface finish.
Regular maintenance, such as using cleaning filaments or performing cold pulls, helps keep the nozzle free from debris. Additionally, inspecting the nozzle before starting a new print job can prevent many common printing issues.
When printing temperature towers, it’s crucial to verify that each section is printed at the intended higher temperature. Some slicers allow custom G-code insertion to change temperatures mid-print accurately.
Double-check your G-code to ensure correct temperature commands are placed at the right layers. This practice ensures that the test accurately reflects the temperature variations and provides reliable data for optimizing print settings.